Easy Steps: Sharing Your Samsung Pictures with Anyone, Anywhere

Easy Steps: Sharing Your Samsung Pictures with Anyone, Anywhere
Quick Links
- How to Create a Shared Album Link in Samsung Gallery
- How to Share an Existing Album in Samsung Gallery
- Share Group Photos With Ease
Key Takeaways
- Open the Gallery app and go to Albums, then tap “+” to create a “Shared Album.” After setting it up and adding some photos, open the “Album Settings” and enable the “Album Link” to generate a link you can share with anyone.
- Recipients can view and download shared photos and videos from the album link for 30 days.
We all love to share photos with other people, which is why Samsung added a “Shared Album” feature to the Gallery app. This lets you view, add, and edit photos in an album you share with other Samsung users. But what if you want to share a photo album with all the non-Samsung users in your life?
Luckily, Samsung thought of that as well and made it so you can create a link to a shared album, which anybody can view in a browser. Other people won’t be able to add or edit photos when you share an album this way, but they can view and download them for 30 days instead.
How to Create a Shared Album Link in Samsung Gallery
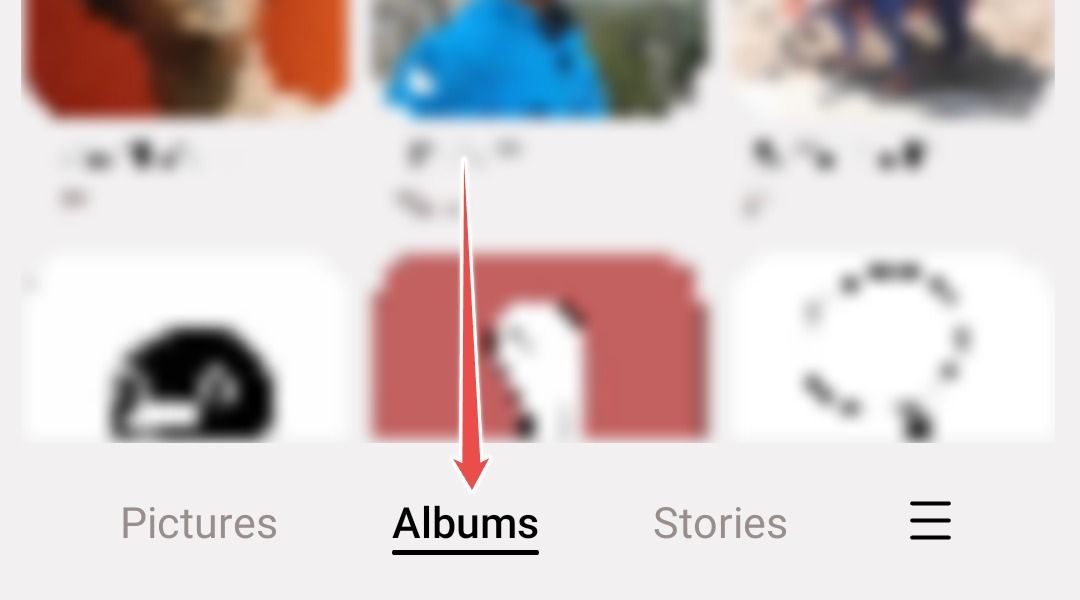
To create a link to a photo album, which you can share with anybody, you first need to create a shared album. Open the default Gallery app on your Samsung phone. Make sure that you are on the “Albums” tab at the bottom.
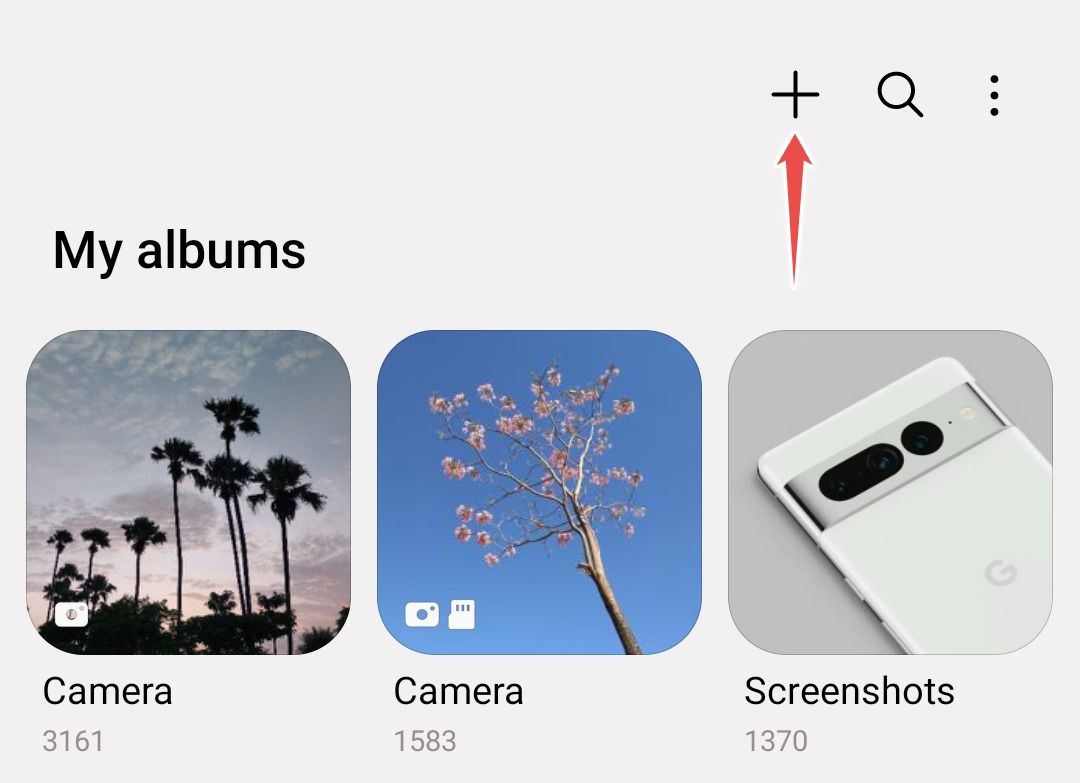
Here, tap the “+” icon at the top of the screen.
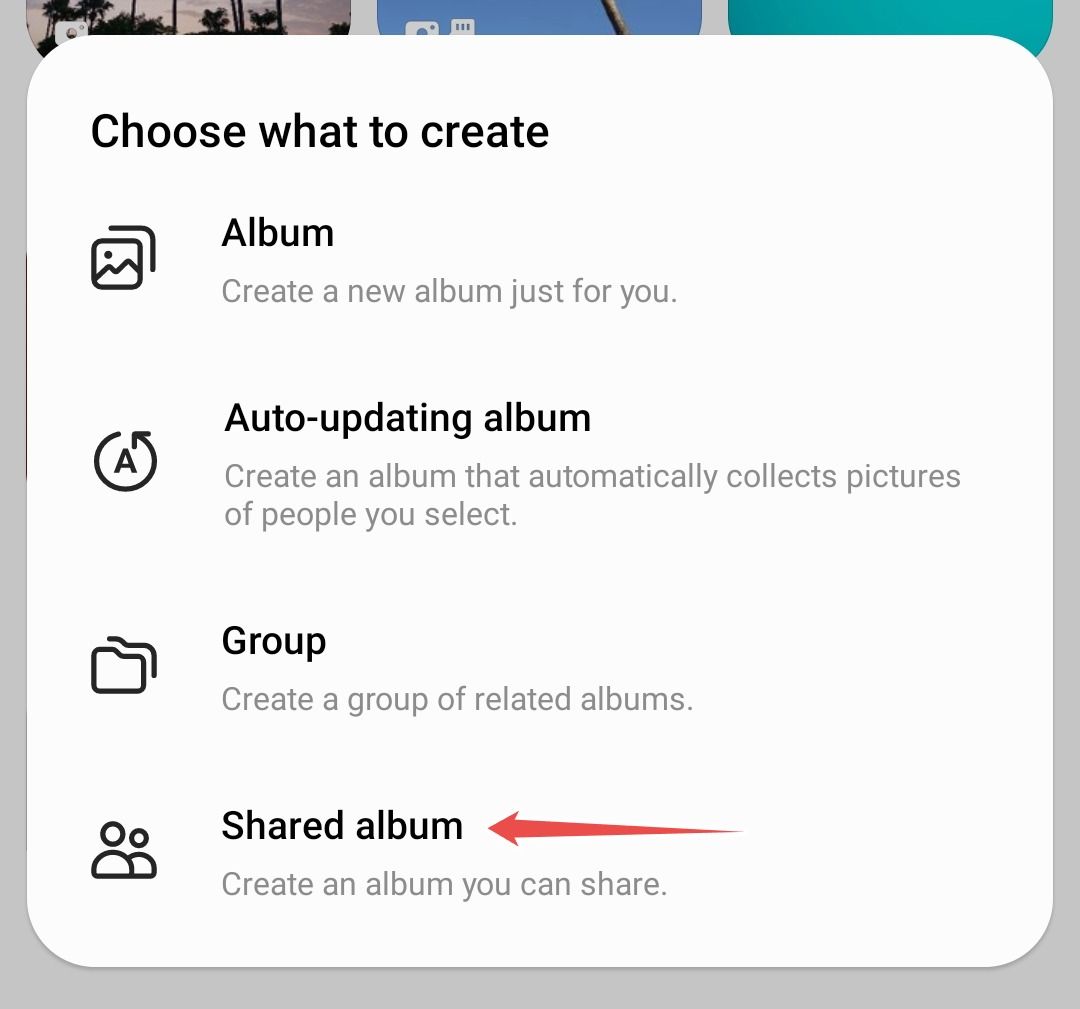
Select “Shared Album” from the menu that appears.
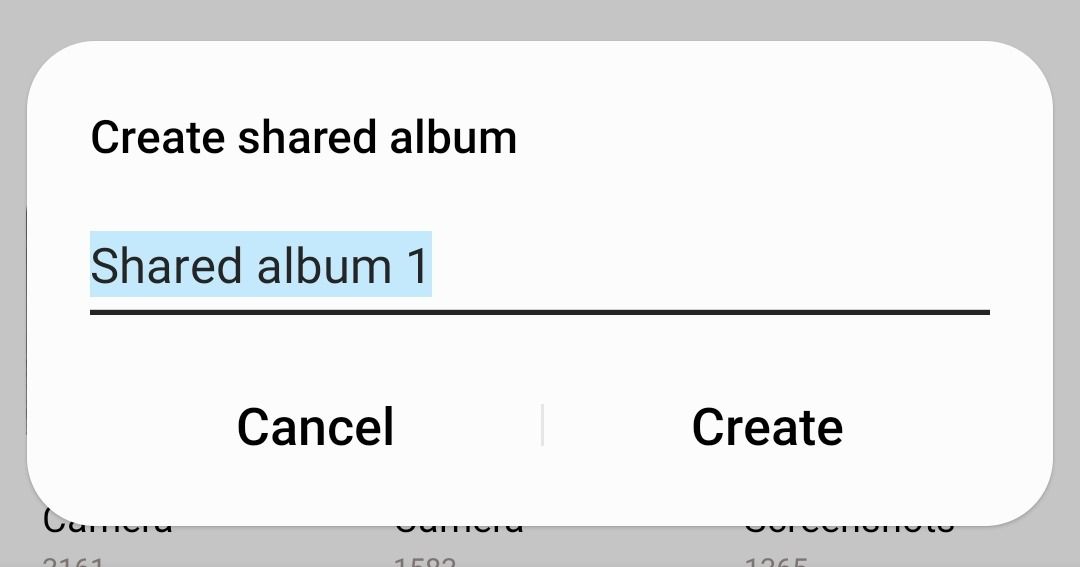
Give this shared album a name and tap “Create.”
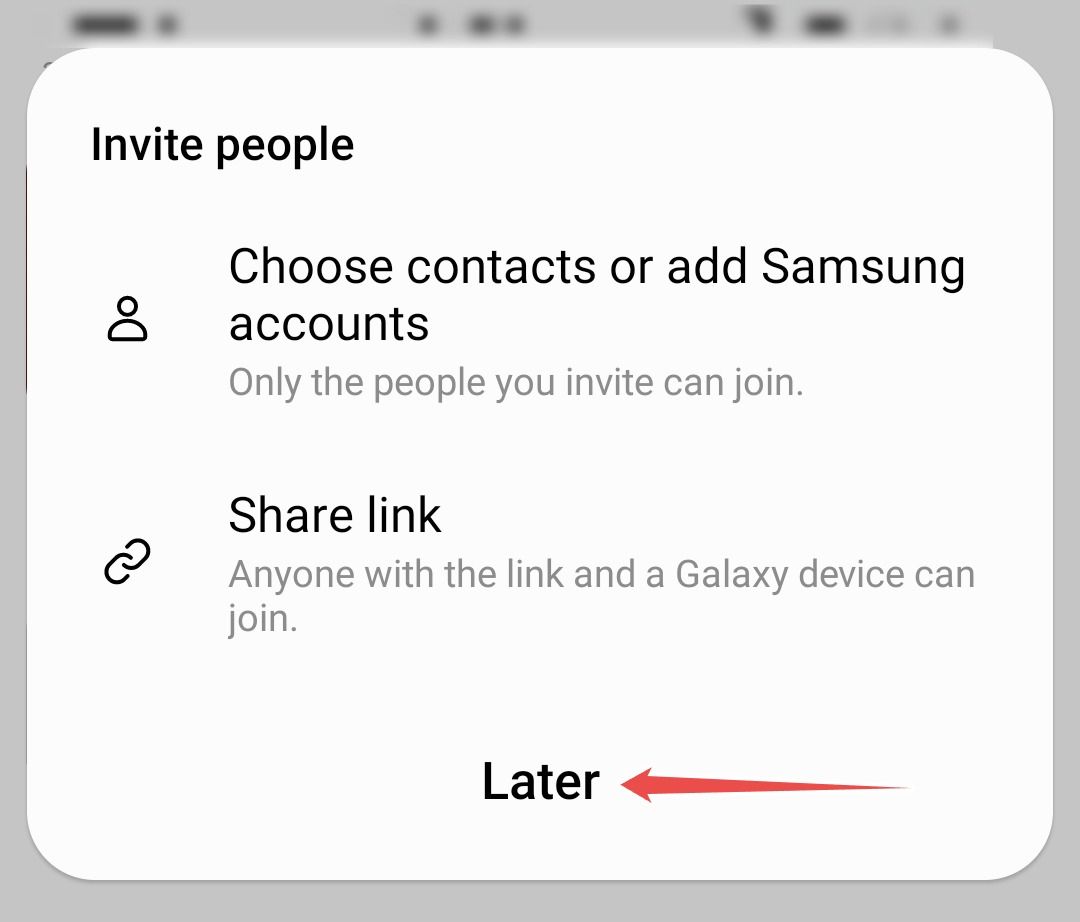
When asked to invite people, tap “Later.” Anybody you choose to invite at this stage will be able to add and edit photos in the album, but they’ll also need their own Samsung account.
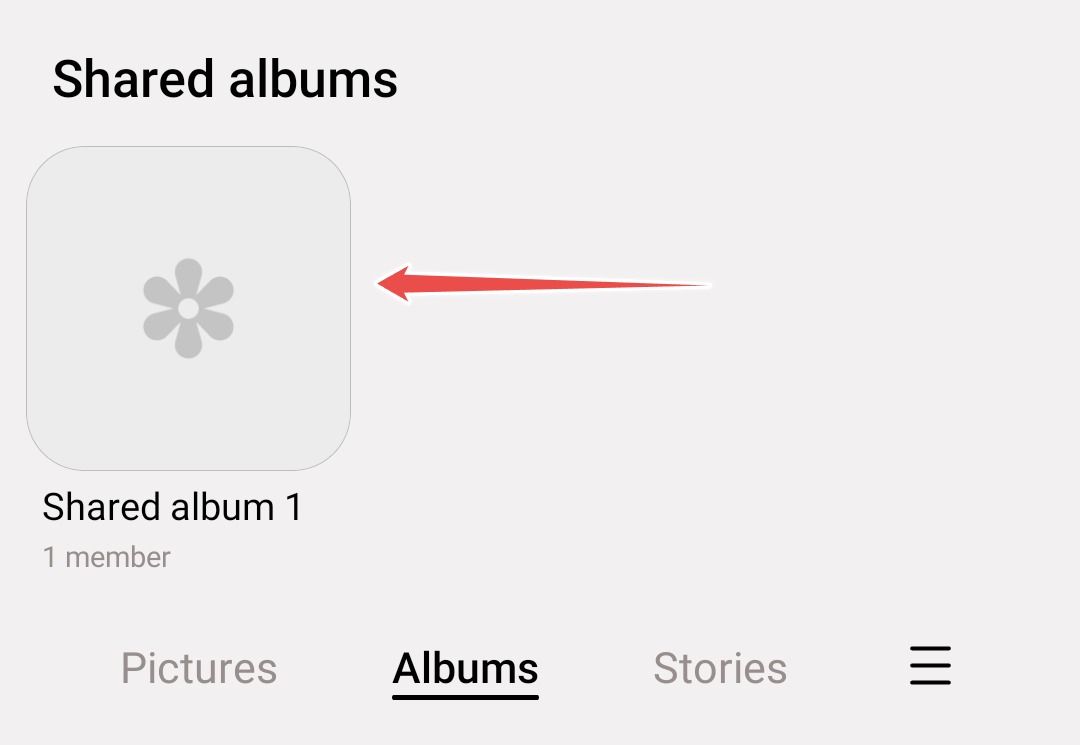
Scroll down to the bottom of your gallery to find and open your shared album.
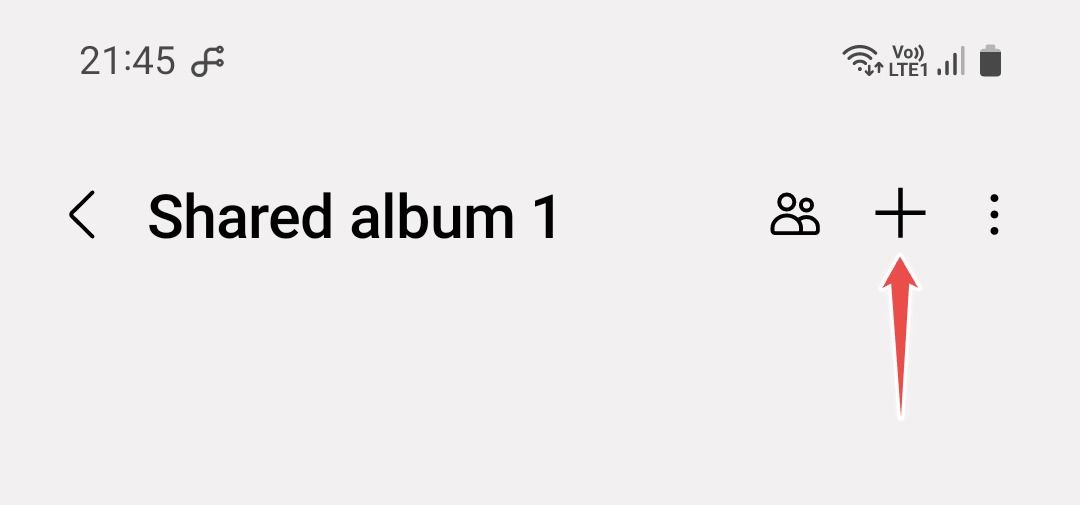
Here, tap the “+” icon at the top and then select the photos and videos you want to add to this album from your existing albums.
You might have to wait a few seconds for the photos to upload. Once done, tap the three-dots menu at the top.
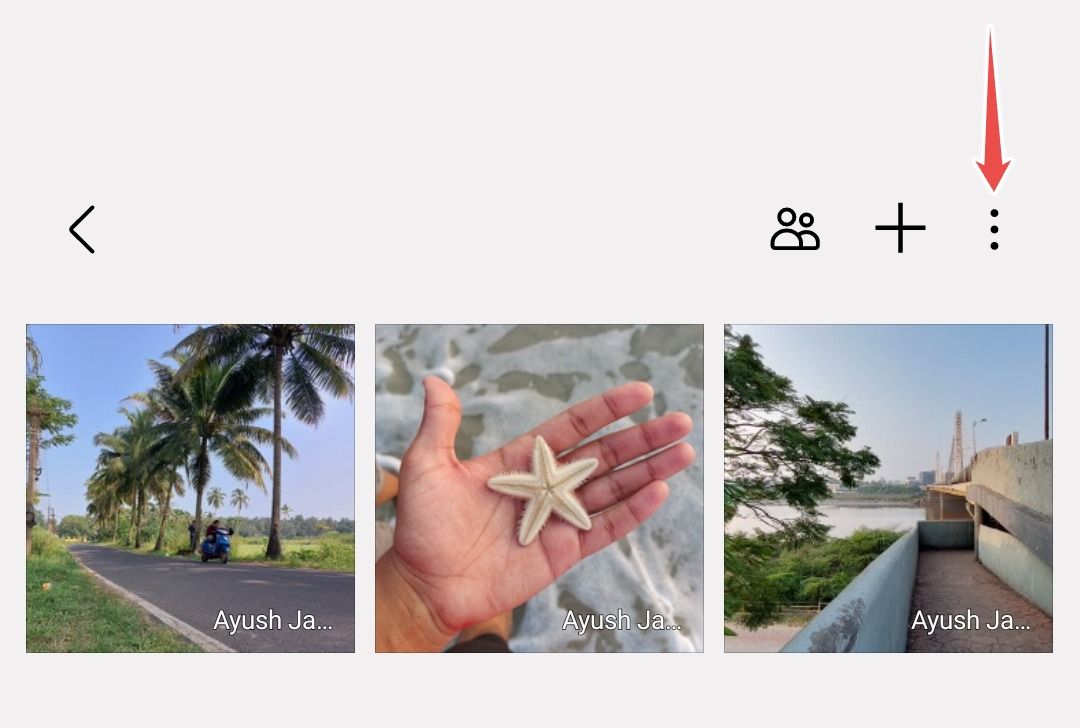
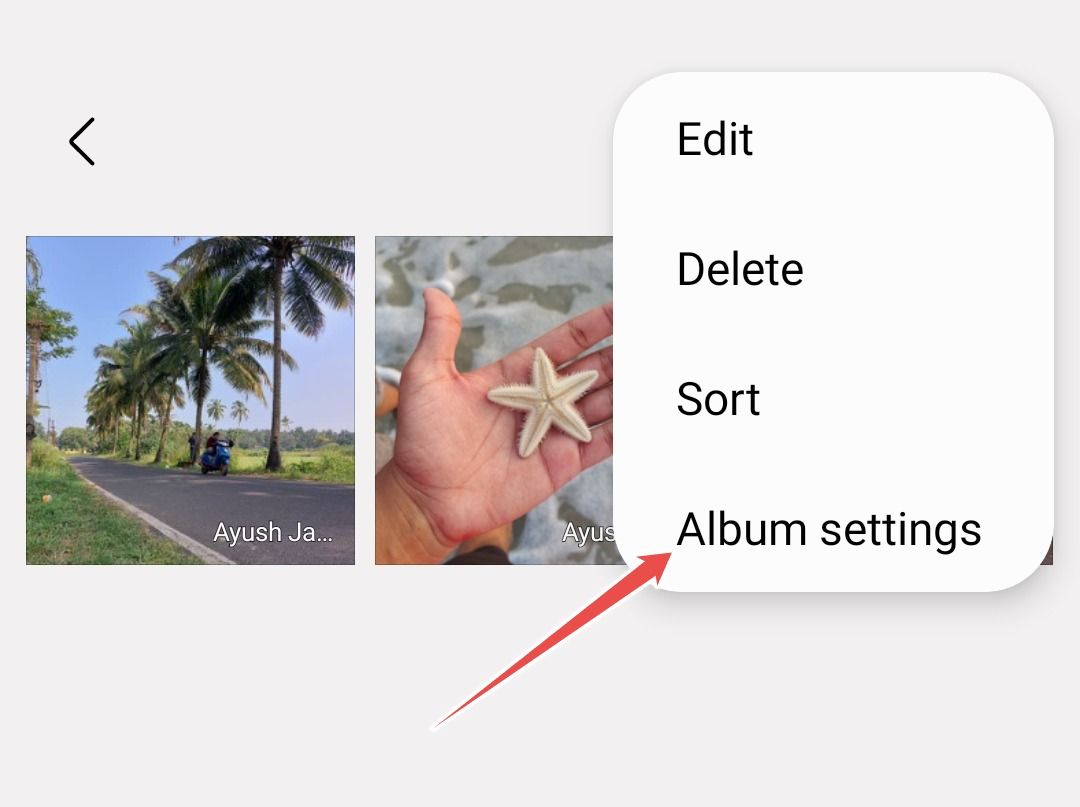
Select “Album Settings” from the drop-down list.
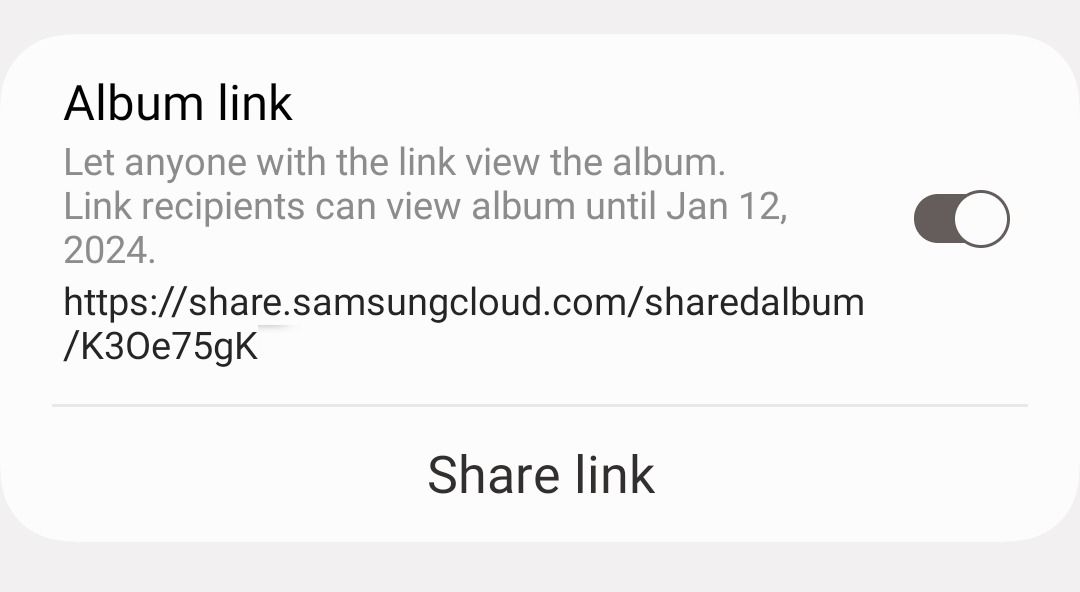
Here, toggle on “Album Link” to reveal a share link. Tap “Share Link” to send the link to the desired recipients via SMS, Gmail, WhatsApp, or any other means. This link will work no matter if the recipients have a Samsung phone, an iPhone, or a non-Samsung Android phone, so you don’t have to worry about compatibility.
When a recipient clicks on this link, your shared album will open in a web browser on their phone. There, they will be able to view all the photos and videos in your album and download the ones they like on their device.
How to View All Your Shared Albums in Samsung Gallery
Let’s say you’ve gotten the hang of using shared albums and have created a bunch of them. Perhaps one for family, one for friends, and one for coworkers. To view and manage all of them, open the Gallery app and tap the hamburger menu (three horizontal lines).
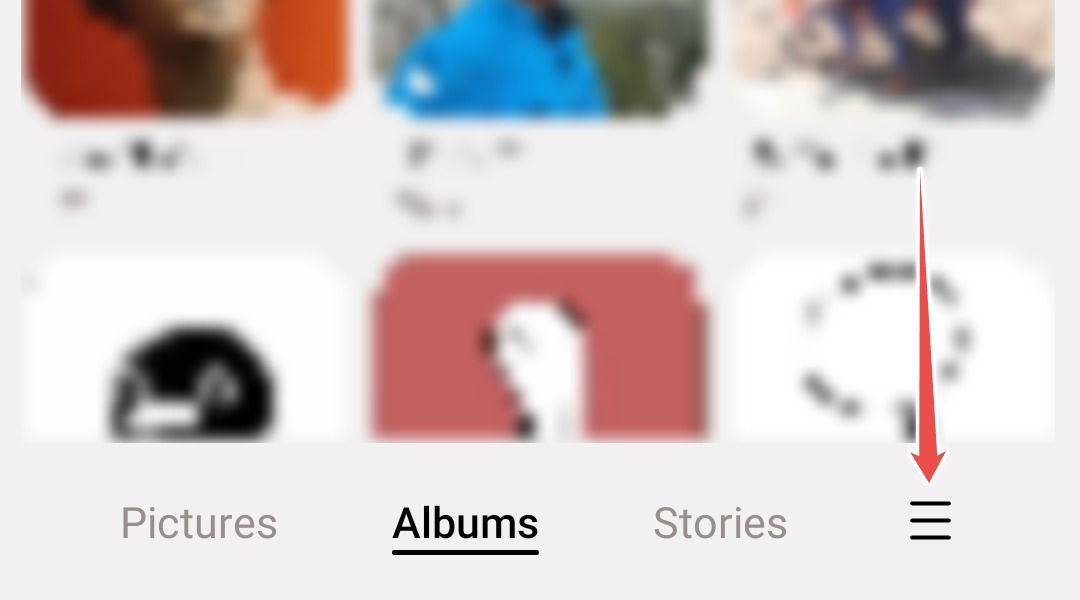
Tap “Shared Albums.”
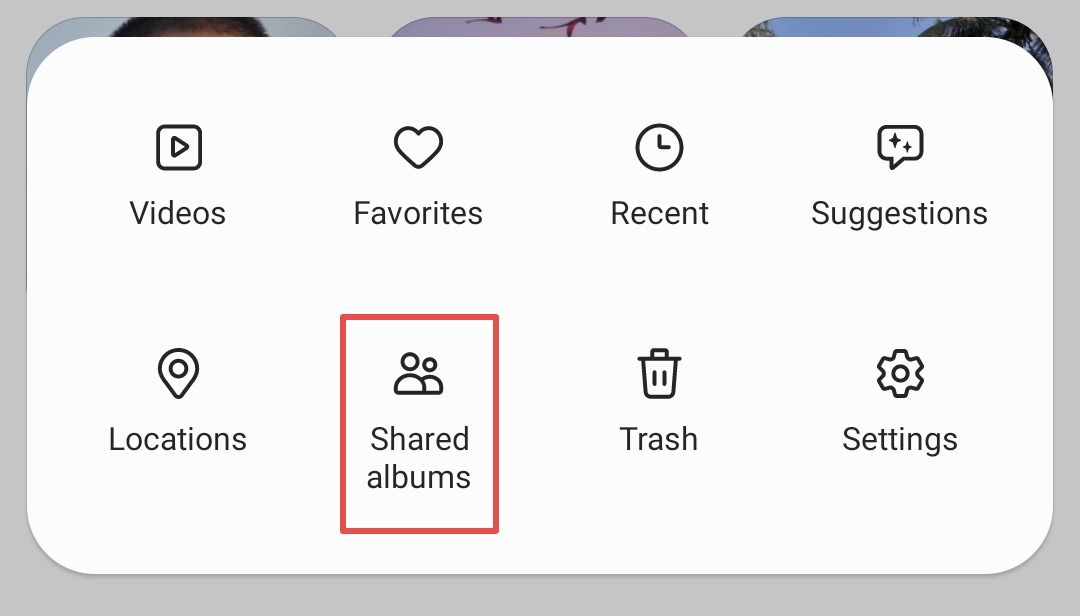
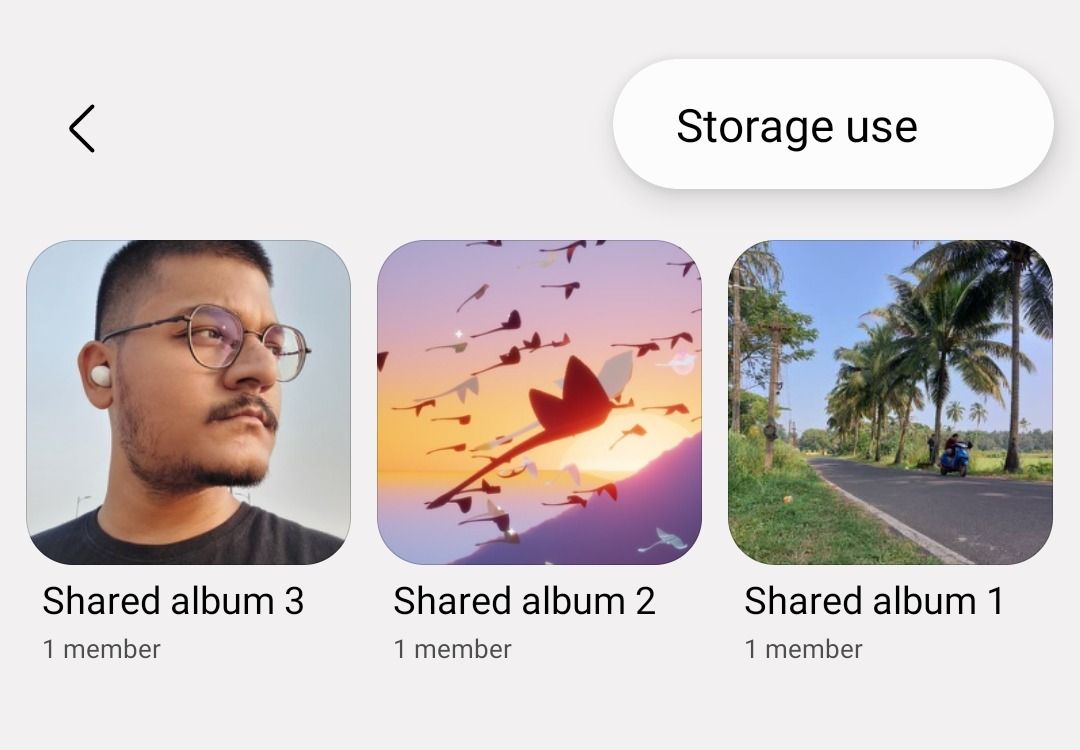
Here, you can see all your shared albums in one place. You can long-press an album to rename or delete it.
You’re only allowed 5GB of free cloud storage across all shared albums, so I highly recommend against uploading movies or large video files as that can quickly use up your storage. To see how much you’re using right now, tap the three-dots menu and tap “Storage Use.”
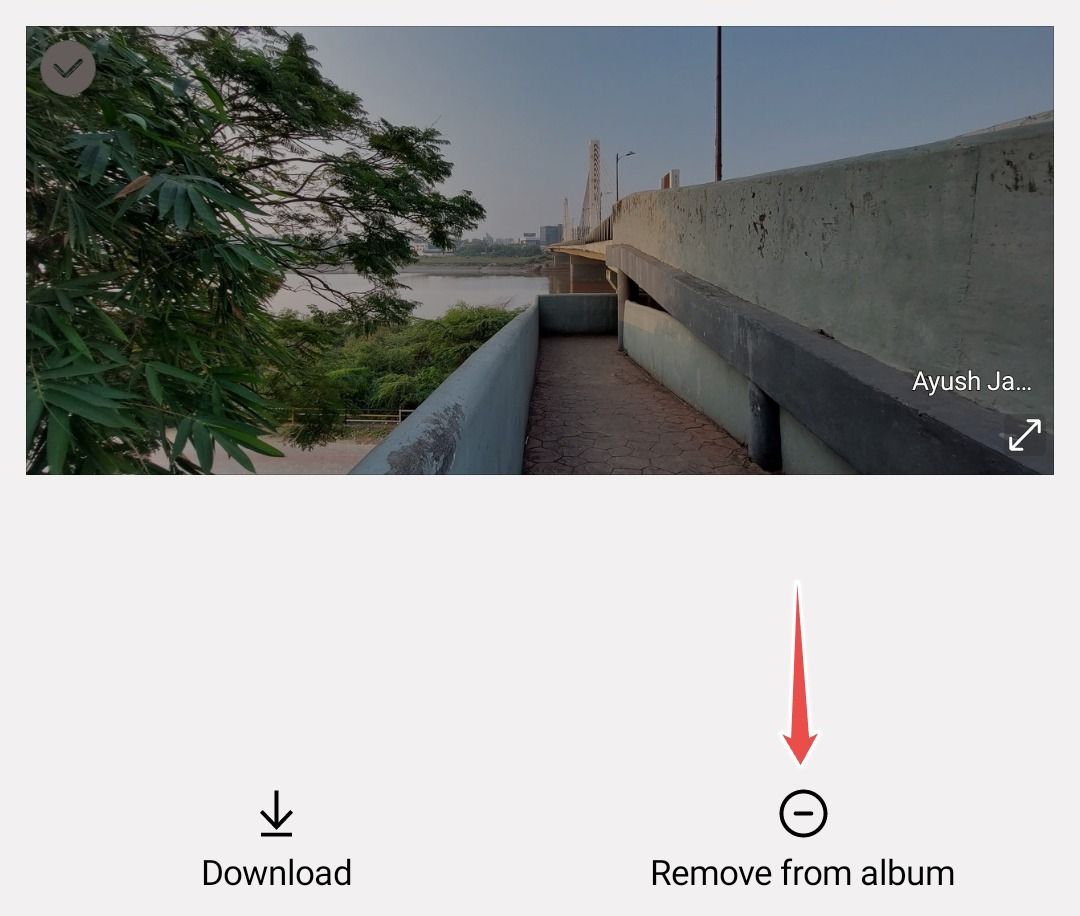
To remove a single item from a shared album, open that album and then long-press your desired photo or video and tap “Remove from album” at the bottom.
How to Stop Sharing a Shared Album in Samsung Gallery
Shared album links automatically expire after 30 days. After that, the recipients will no longer be able to view your album or download items from it. If you want to stop sharing an album before 30 days, the quickest way is to just delete it, but that’s not ideal because you might want to send it again to someone else in the future.
So, instead, open the album you want to stop sharing, tap the three-dots menu, select “Album Settings,” and toggle off “Album Link.”
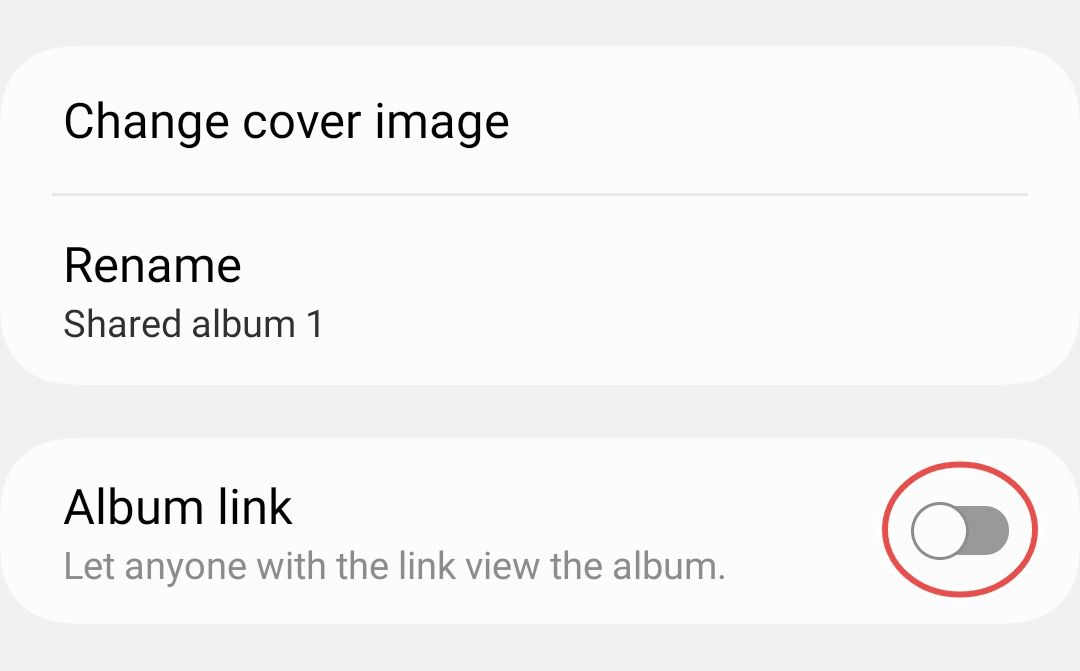
If you toggle it on again in the future, a new link will be generated and the timer will be reset to 30 days.
How to Share an Existing Album in Samsung Gallery
We’ve shown you how to create, share, manage, and stop sharing a shared album, but what about the existing albums you already have in your gallery?
You probably already know how to share individual photos and videos within an existing album, but can you share the whole album? Well, yes, existing albums can indeed be shared, but the process of doing so is not the same as sending a dedicated shared album.
To share an existing album, you’re going to need the help of a data transfer tool such as Google’s Nearby Share which is available on all Android phones, or, Samsung’s Quick Share which comes pre-installed on all Galaxy devices. We’ll be using Quick Share in this guide because it’s the better of the two alternatives for reasons too complicated to explain here.
To share an existing album, open the Gallery app, long-press your desired album, and tap “Share” at the bottom.
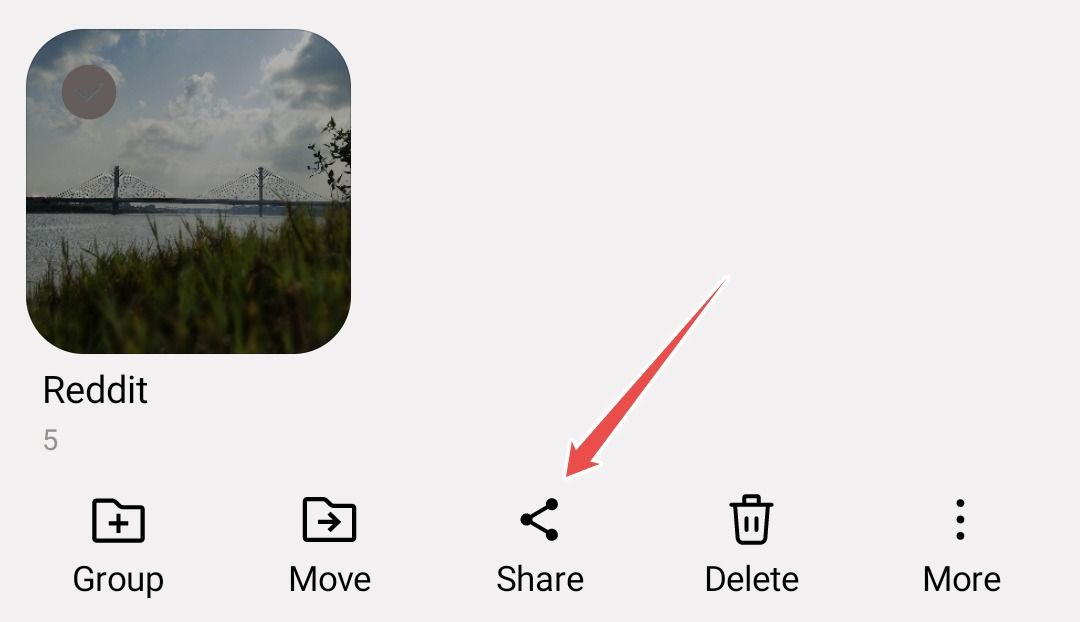
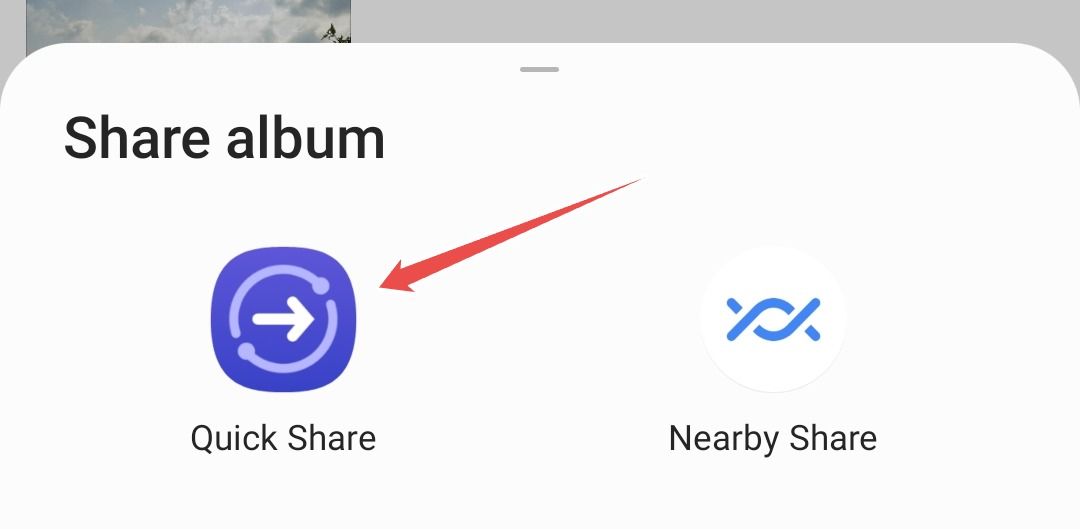
Select “Quick Share” from the following pop-up.
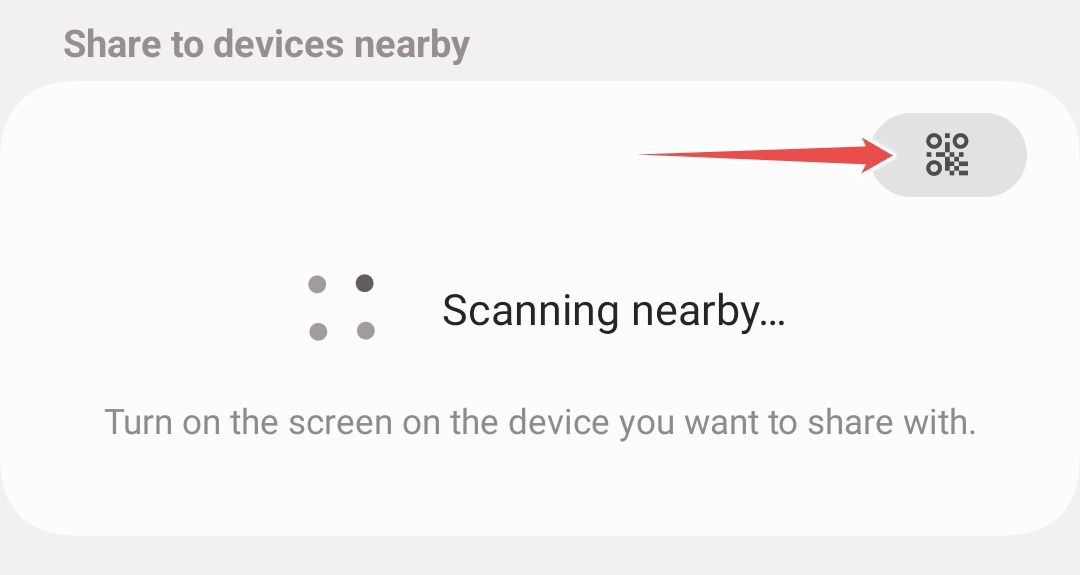
Tap the QR code icon.
This will pull up a QR code. Ignore that. Instead, tap “Copy URL” underneath it.
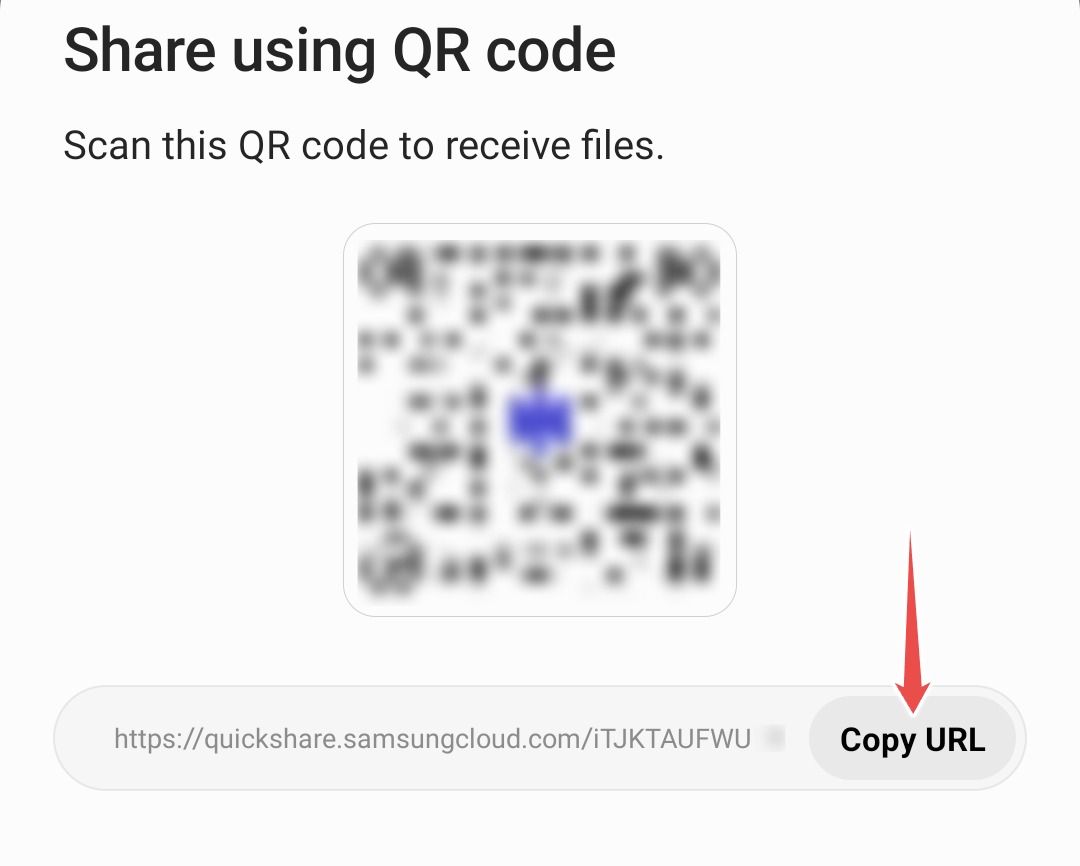
The share link is now copied to your clipboard. Go ahead and send this link to the desired recipients. Just like last time, when a recipient clicks on this link, your album will open in a web browser on their phone, and they’ll be able to view all the photos and videos in it and select which ones they want to download.
How to View Shared Existing Albums
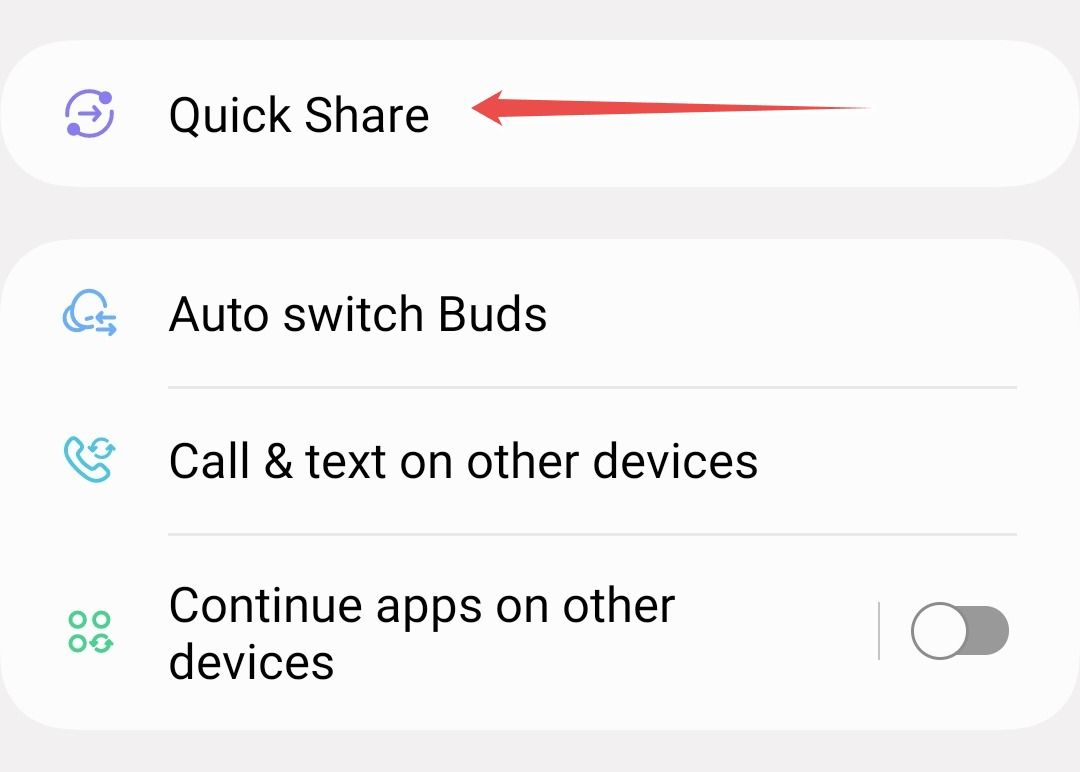
Note that Quick Share allows up to 5GB of data transfer per day, so you can send albums containing movies or large video files as well. To see how much storage you’ve used today, go to Settings > Connected Devices > Quick Share.
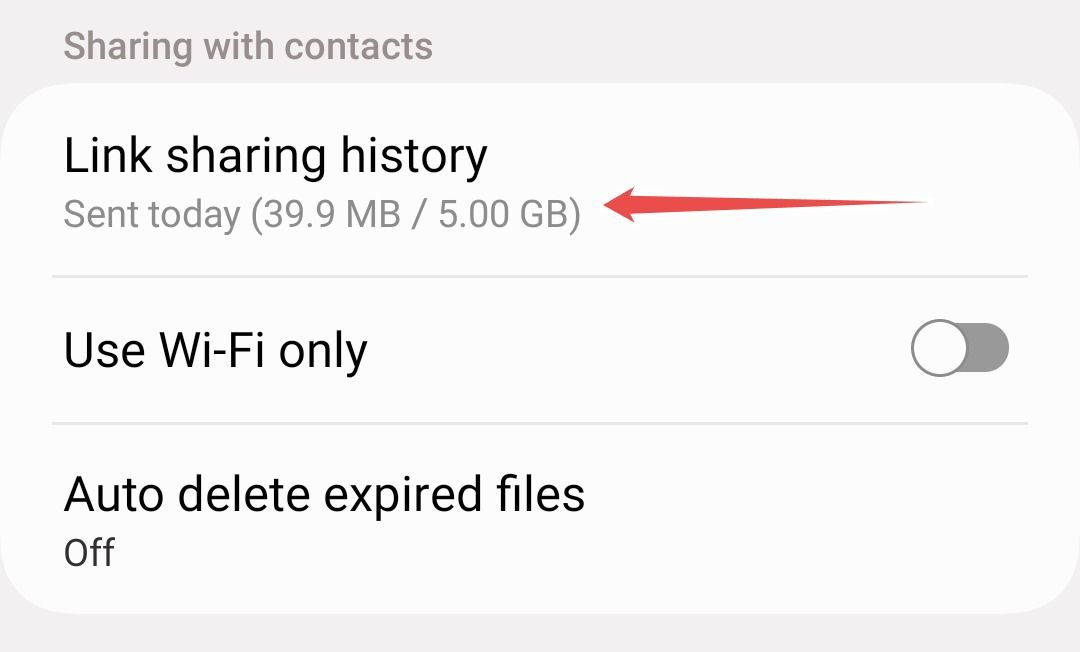
Here, under “Link Sharing History,” you can see how much data you’ve transferred today.
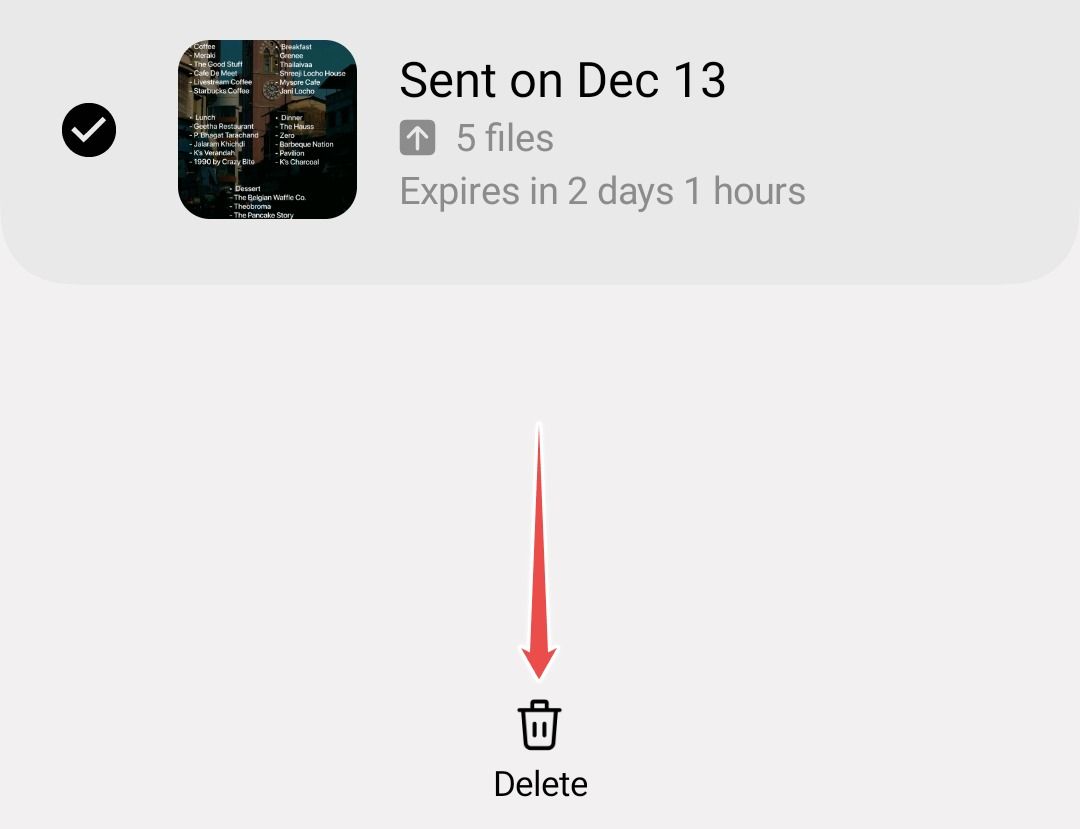
Tapping “Link Sharing History” will reveal all the albums you’ve shared, when you shared them, how many items they contain, and when their share link will expire. You can long-press an album to delete it from the list.
How to Stop Sharing Existing Albums
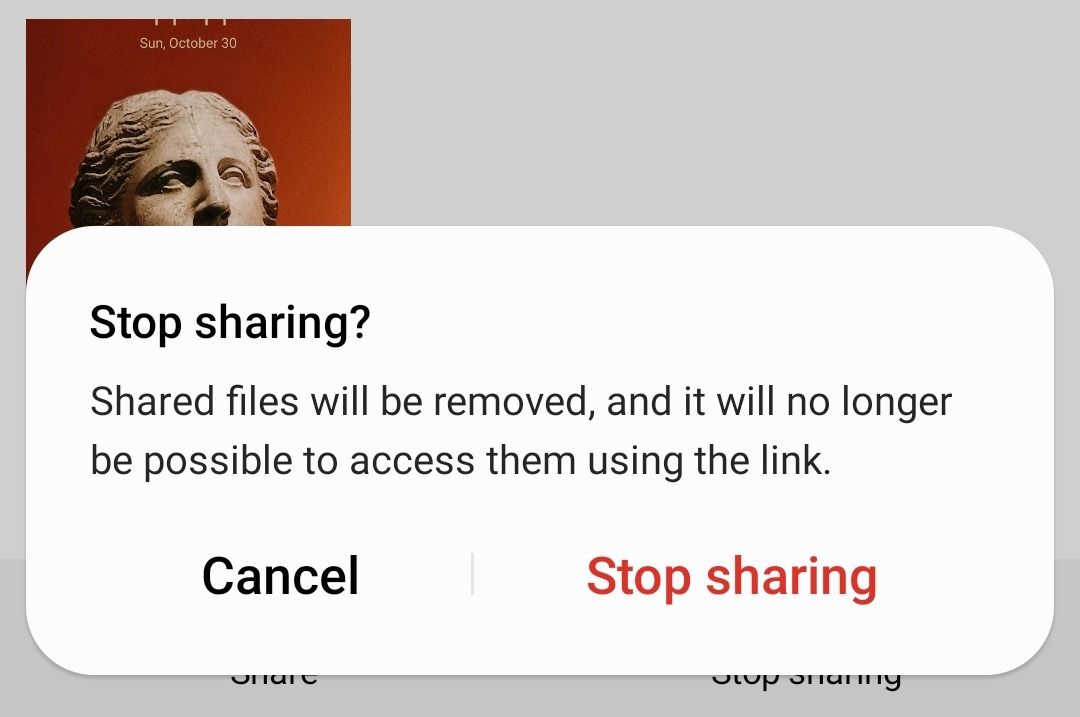
Just like shared albums, existing albums sent via Quick Share automatically expire after some time (two days by default) and the share link stops working. To stop sharing an existing album before that, go to the “Link Sharing History” menu, tap on your desired album, and tap “Stop Sharing” at the bottom.
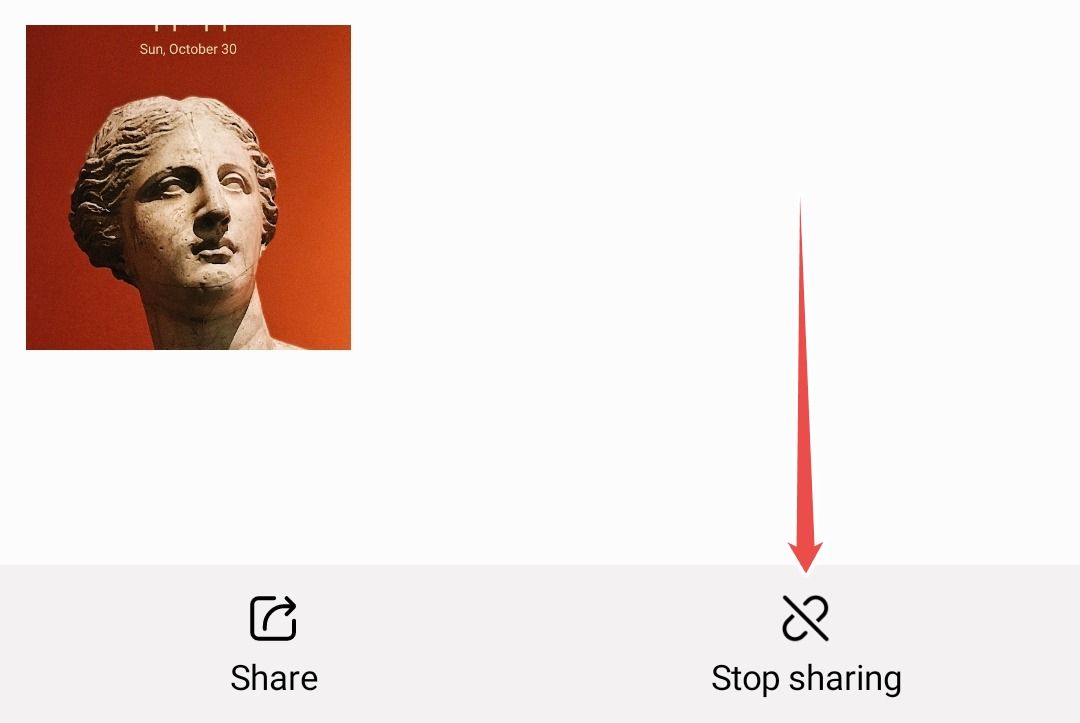
Tap “Stop Sharing” again on the pop-up to confirm.
Share Group Photos With Ease
Remember that anyone with a share link will be able to view and download items from the albums you’ve shared. Because of this, it’s advisable to never add sensitive photos and videos to an album that you intend to share.
If a family member or friend accidentally reshares your share link to an undesired recipient, you can’t selectively restrict that person from accessing your album. In that case, it’s better to stop sharing the album entirely and create a new link.
Also read:
- [New] Top 6 Clearcut Android Recorder Options (No Ads)
- [New] Voice Transformation Tools Magic Edition Highlighted
- [New] YouTube's Shorts A Deep Dive Into Content Creation and Revenue
- [Updated] 2024 Approved Top 5 Tools for Capturing Facebook Live Videos
- 8 Ultimate Fixes for Google Play Your Realme 11X 5G Isnt Compatible | Dr.fone
- Discover the Ultimate Collection of Holiday Discounts for Dell Systems: In-Depth Deal Analysis at Walmart, Target, eBay & More | Expert Insights
- Exploring the Extraordinary: How Lenovo's Innovative ThinkPad X1 Fold Redefines Laptops - A Unique Review by ZDNet
- How to Bypass Google FRP Lock on Vivo Y200e 5G Devices
- HP Victus 15 Gaming Laptop for Just $515: Unbeatable Prime Day Blowout At Best Buy Exposed by ZDNet!
- In-Depth Analysis of Panasonic Toughbook G2: Durable & Versatile Laptop Reviewed by Tech Expert
- Say Goodbye to Bulky Cameras: Opal Reveals Ultra-Compact, Effortless Clip-On Webcam Upgrade for Your Laptop's Photography Woes | Digital Trends
- Strategies for Adding Value YouTube's Card System for 2024
- The Ultimate Tech Guide Handling SRT on a Mac for 2024
- Unbelievable Cyber Monday Savings: Snag a Microsoft Surface Pro
- Unbelievable Value: High-Performance M3 MacBook Pro for Under $10K - The Ultimate Tech Find
- Unraveling Windows 11/10'S D3D11 Compatible GPU Riddle
- Your Ultimate Holiday Sale Guide: Score Steals on Gadgets and Entertainment Systems | Authorized Tips
- Title: Easy Steps: Sharing Your Samsung Pictures with Anyone, Anywhere
- Author: Richard
- Created at : 2024-12-19 06:37:04
- Updated at : 2024-12-21 22:22:33
- Link: https://hardware-updates.techidaily.com/easy-steps-sharing-your-samsung-pictures-with-anyone-anywhere/
- License: This work is licensed under CC BY-NC-SA 4.0.